Air Cooled vs Water Cooled Condensing Unit: 2026 Pros & Cons

Compare efficiency and costs in the air cooled vs water cooled condensing unit choice. Get 2026-ready insights and selection tips to pick the right system.

When comparing an air cooled vs water cooled condensing unit, the right choice depends entirely on your priorities. For large-scale industrial applications, water-cooled units deliver superior energy efficiency and more stable performance. However, air-cooled systems offer a simpler, more cost-effective solution with a lower upfront investment, making them ideal for smaller operations or in regions where water is scarce. This decision will impact everything from your budget to your monthly electricity bills, especially in the demanding climate of South India.

This guide breaks down the comparison across key factors like efficiency, cost, and maintenance to help you determine which technology is the smart, informed choice for your business.

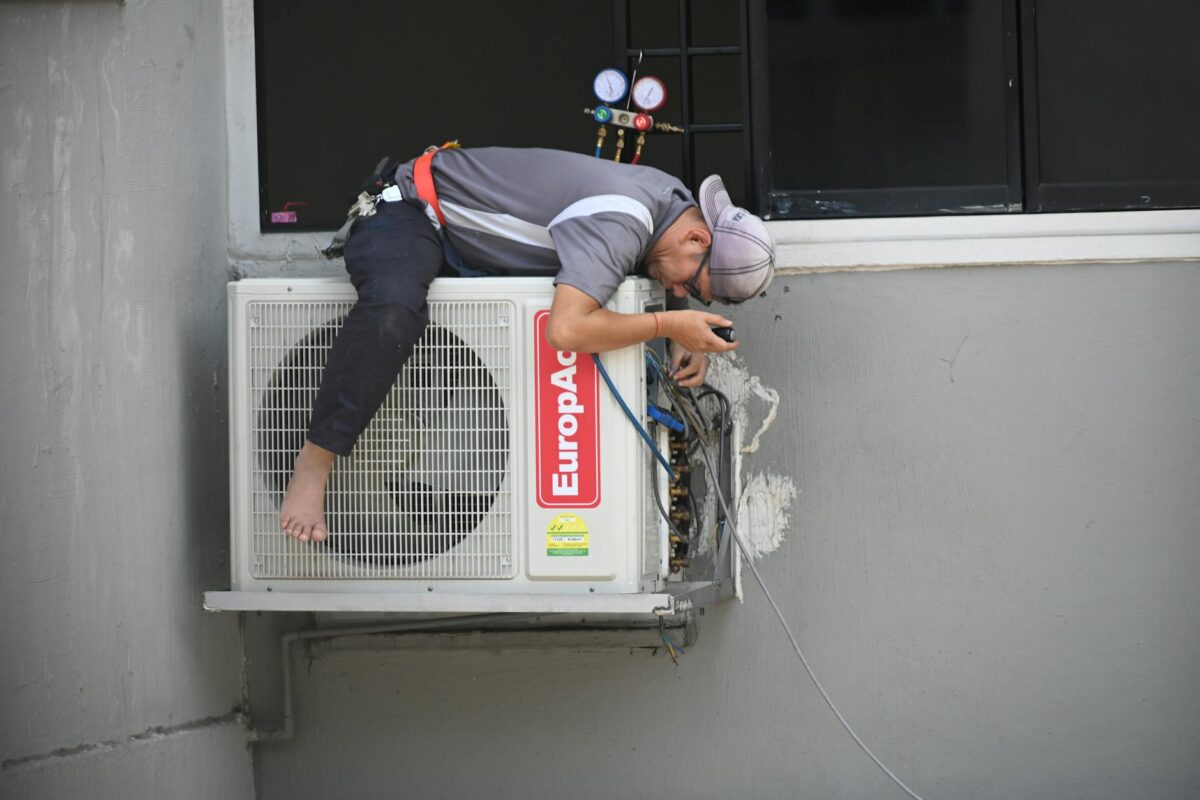
What is an Air Cooled Condensing Unit?

An air cooled condensing unit is a refrigeration component that uses the surrounding air to cool down and condense hot refrigerant gas back into a liquid. Think of the outdoor unit of a typical home air conditioner. A large fan blows ambient air across a series of finned coils containing the hot refrigerant, transferring the heat from the refrigerant into the atmosphere.

These units are popular because they are self contained. They don’t require any water hookups or complex plumbing, which makes installation simpler and keeps the initial cost down. This simplicity makes them a common choice for smaller applications like residential AC, walk in coolers, and businesses where water is either unavailable or expensive.

What is a Water Cooled Condensing Unit?

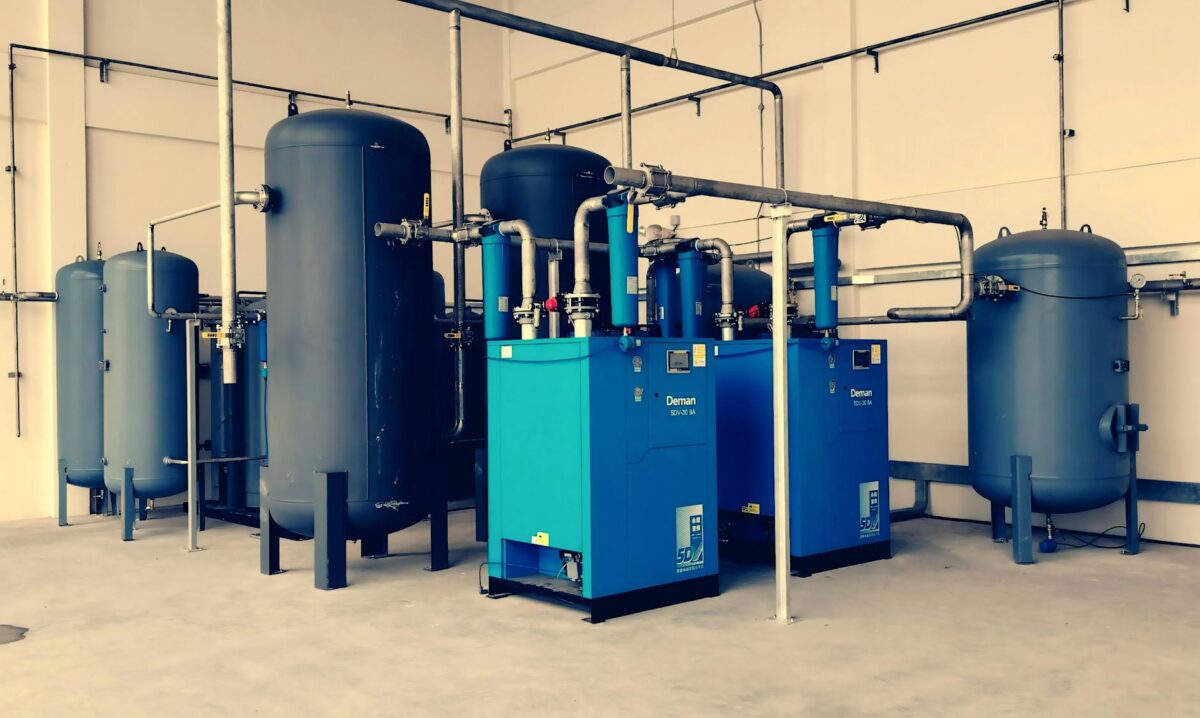
A water cooled condensing unit uses water instead of air as its cooling medium. In these systems, the hot refrigerant gas passes through a heat exchanger (often a shell and tube or plate type) where it transfers its heat to circulating water. This heated water is then pumped to an external device, usually a cooling tower, to release the heat.

Because water is much better at absorbing and transporting heat than air, water cooled units are incredibly efficient. This makes them the go to choice for large scale commercial and industrial applications like food processing plants, high rise buildings, and large cold storage warehouses where high capacity and energy efficiency are top priorities.

Cooling Medium and Method: Air vs. Water

The fundamental difference in the air cooled vs water cooled condensing unit debate comes down to the cooling medium and the method used to reject heat.

  • Cooling Medium: This is the substance that carries heat away from the refrigerant. For an air cooled system, the medium is air. For a water cooled system, it’s water. Water has far superior thermal properties; it can absorb and remove much more heat per unit of volume compared to air. In fact, air has relatively poor thermophysical properties as a coolant, which is why air cooled systems need larger surfaces and more airflow to do the same job.

  • Cooling Method: This describes how heat is rejected. Air cooled units use a direct or “dry” cooling method. Water cooled systems typically use an “evaporative” cooling method. The water that absorbs heat in the condenser is cooled in a cooling tower, where a small portion evaporates, dramatically cooling the rest of the water. This evaporative process is the secret to their high efficiency.

Performance in the Real World: Temperature and Stability

How a unit performs on the hottest day of the year is a critical consideration, especially for businesses in regions like Tamil Nadu or Andhra Pradesh.

Condensing Temperature: The Key to Efficiency

Condensing temperature is the temperature at which the refrigerant turns from a gas to a liquid. The lower this temperature, the less work the compressor has to do, which means lower energy consumption.

  • Air Cooled: The condensing temperature is directly tied to the ambient (dry bulb) air temperature. For heat to transfer effectively, the refrigerant must be significantly hotter than the air, often around 11 to 17 °C (20 to 30 °F) higher. So on a 35 °C day, the condensing temperature might be as high as 46 to 52 °C, forcing the system to work very hard.

  • Water Cooled: The condensing temperature is linked to the wet bulb temperature of the air, which is the lowest temperature that can be reached through evaporation. The wet bulb temperature is almost always lower than the dry bulb temperature. This allows a cooling tower to produce cool water even on a hot day, resulting in a much lower and more stable condensing temperature for the system.

Performance Stability Across Conditions

Because of their reliance on ambient air, the performance of air cooled systems can fluctuate significantly with the weather. Their cooling capacity drops and their energy use spikes on very hot days.

Water cooled units offer far more stable and consistent performance. Since they rely on the more stable wet bulb temperature, they are less affected by daily temperature swings, ensuring reliable cooling capacity when you need it most, like during peak summer heatwaves. For critical applications like pharmaceutical storage, blast freezing, or food processing, this stability is a massive advantage.

The Bottom Line: Initial Cost vs. Operating Costs

Your budget is always a key factor. Here’s how the two options stack up financially.

Upfront Investment (Initial Cost)

Generally, air cooled systems have a lower initial cost. They are simpler, packaged units that don’t require the extra equipment and complex installation that water cooled systems do.

A water cooled system requires a cooling tower, water pumps, extensive piping, and water treatment equipment, all of which add to the upfront price. The initial capital cost for a water cooled system can be 20% to 40% higher than an air cooled system of the same capacity.

Long Term Expenses (Operating Costs)

This is where water cooled systems shine. Thanks to their superior efficiency, water cooled units have significantly lower operating costs, driven primarily by lower electricity consumption. They can consume roughly half the energy of a comparable air cooled unit to produce the same amount of cooling. Over the lifespan of the equipment, these energy savings can be substantial. One study showed a 200 ton water cooled system saving about $20,000 per year in electricity, paying back its higher initial cost in just a few years.

However, water cooled systems do have other operating costs to consider, namely water consumption from the cooling tower and the cost of water treatment chemicals. For most large applications, the energy savings far outweigh these additional costs.

At F-Max Systems, we help our clients analyze these trade offs to find the most cost effective solution for their specific needs. Get a customized cost analysis for your project from F-Max Systems.

Practical Considerations: Installation, Space, and Upkeep

Beyond performance and cost, you need to consider the practical logistics of installing and maintaining your system—including the quality of PUF panels and insulated doors that determine overall insulation performance.

Installation and Space Requirements

  • Air Cooled: Installation is relatively simple. The unit is placed outdoors on a roof or pad, connected to power and the refrigerant lines. However, the units themselves are physically larger and require significant open space for proper airflow.

  • Water Cooled: Installation is more complex, requiring skilled technicians to install the condensing unit, cooling tower, pumps, and all the associated water piping. While the condensing unit itself is often more compact, the entire system requires both indoor mechanical room space and outdoor space for the cooling tower.

Maintenance Needs

  • Air Cooled: Maintenance is straightforward. The main task is regularly cleaning the condenser coils to remove dust and debris, which can hinder airflow and reduce efficiency (see our guide on preventive maintenance of cold rooms).

  • Water Cooled: Maintenance is more involved. It requires a consistent water treatment program to prevent scale, corrosion, and biological growth like algae. The cooling tower also needs periodic cleaning, and the condenser tubes may need to be brushed clean annually to maintain peak performance. While more demanding, a well maintained water cooled unit often has a longer lifespan, potentially lasting 25 years or more compared to about 15 years for an air cooled unit.

Key Factors You Can’t Ignore

A few more critical factors can influence your decision in the air cooled vs water cooled condensing unit debate.

Water Availability and Consumption

This is a non negotiable point. Water cooled systems continuously consume water through evaporation. If your facility is in an area with scarce, expensive, or unreliable water, an air cooled system is the practical choice, as it uses zero water.

Noise Levels

Air cooled units are generally louder due to the large fans needed to move massive volumes of air. Water cooled systems tend to be much quieter, as the condenser is often located indoors and the cooling tower, while it has a fan, can be placed away from noise sensitive areas.

Environmental Impact

There’s a trade off here.

  • Water Cooled systems are more energy efficient, which means a smaller carbon footprint from electricity generation. However, they consume significant amounts of water.

  • Air Cooled systems conserve water but use more electricity, leading to higher indirect greenhouse gas emissions.

Air Cooled vs Water Cooled Condensing Unit: How to Choose

The best choice depends entirely on your specific circumstances. There is no single right answer. Here are the key selection criteria to weigh:

  • Climate: In very hot climates, the efficiency and stability of water cooled systems are a major advantage.

  • Initial Budget: If upfront capital is tight, the lower initial cost of an air cooled system is attractive.

  • Operating Costs: For large systems with high run hours, the long term energy savings from a water cooled unit often provide the best return on investment.

  • Water Availability: If water is scarce or expensive, an air cooled unit is the clear winner.

  • Space: Consider your available indoor and outdoor space. Do you have a spot for a cooling tower or a large open area for an air cooled unit?

  • Maintenance Capability: Be realistic about your team’s ability to handle the water treatment and maintenance required for a water cooled system.

Making this decision requires careful consideration of all these factors. For a deeper dive into facility planning, see our cold-chain warehouse guide. Consulting with experienced refrigeration professionals can provide clarity and ensure you select a system that delivers reliable performance and value for years to come.

The team at F-Max Systems specializes in designing and manufacturing refrigeration solutions engineered for the tough conditions of South India. Reach out to us today to discuss your project and get an expert recommendation tailored to your needs.

Frequently Asked Questions

1. Which is better, an air cooled or water cooled condensing unit?

Neither is universally “better”. The best choice depends on your specific application, climate, budget, and local resources. Water cooled units are more efficient and stable in hot climates for large loads, while air cooled units are simpler, cheaper upfront, and ideal for smaller applications or where water is limited.

2. Are water cooled condensers more expensive?

Yes, water cooled systems have a higher initial cost, typically 20% to 40% more than air cooled systems. This is due to the need for additional equipment like a cooling tower, pumps, and piping. However, their lower energy consumption often makes them cheaper to run over their lifespan.

3. How much more efficient are water cooled systems?

Water cooled systems are significantly more energy efficient. They can often produce the same amount of cooling while consuming about half the energy of a comparable air cooled system.

4. Do air cooled condensing units use any water?

No, air cooled condensing units use zero water for their operation. Their independence from water is a major advantage in regions with water scarcity.

5. What is the biggest disadvantage of an air cooled condensing unit?

The biggest disadvantage is that its efficiency and cooling capacity decrease significantly as the outdoor air temperature rises. On very hot days, they have to work much harder, which increases energy consumption and can strain the equipment.

6. Can you use a water cooled unit if you don’t have a lot of water?

It is not recommended. Water cooled systems rely on a continuous supply of make up water for the cooling tower to function. In water scarce areas, an air cooled vs water cooled condensing unit comparison heavily favors the air cooled option.

Cold Room Installation: Step-By-Step Guide + Pro Tips (2026)

Cold room installation made simple: plan, build panels, size equipment, seal, test, and commission. Use our 2026 step-by-step guide and pro tips to get it right.

A proper cold room installation is more than just building a cold box; it’s about creating a precisely controlled environment that protects the value and safety of your perishable goods. Whether you’re in the food, pharmaceutical, or horticultural industry, a reliable cold room is the backbone of your operation. Poor cold storage infrastructure contributes to staggering losses, with some studies showing 40 to 50% of fresh produce going to waste.

This guide walks you through every critical step of the cold room installation process, from the initial sketch to the final performance test. We’ll break down the technical details into simple, understandable terms to show you what a professional installation looks like.

Phase 1: Planning and Design

Getting the foundation right, both literally and figuratively, starts here. Rushing the planning phase is a recipe for costly mistakes and an inefficient cold room.

Planning and Site Assessment

Before a single panel is ordered, a thorough site assessment is the first crucial step. A professional installer will evaluate the intended location to ensure it’s suitable. This involves:

  • Accessibility: Can delivery trucks, forklifts, and staff move around the area easily?

  • Structural Integrity: Can the floor support the immense weight of the cold room, its shelving, and a full inventory of products?

  • Ventilation: Is there enough space around the future condenser unit for it to dissipate heat effectively? A stuffy room can choke the refrigeration system.

  • Utilities and Drainage: Is there adequate electrical power available? And is there a place for defrost and cleaning water to drain away safely without pooling?

A detailed site check prevents expensive modifications down the line and is a hallmark of a professional cold room installation. For multi-room or warehouse-scale projects, see our cold-chain warehouse guide.

Design and Equipment Selection

With a viable site confirmed, the focus shifts to designing the cold room itself. This is where your specific needs shape the project. Key decisions include:

  • Sizing: The room must be large enough for your maximum expected inventory, with extra space for airflow.

  • Temperature Range: Are you building a chiller (around 0 to 5 °C), a freezer (around -20 °C), or a blast freezer for rapid cooling (down to -40 °C)? This choice affects everything from insulation thickness to the type of refrigeration machinery needed. If you’re unsure which is right for you, read our guide on blast chiller vs. blast freezer.

  • Cooling Load Calculation: Engineers calculate the total heat the refrigeration system needs to remove. A standard freezer might require around 75 watts of cooling power per cubic meter, but this is adjusted for factors like door openings and ambient heat. The refrigeration unit is then sized to handle a bit more than this peak load to avoid running at 100% capacity all the time.

  • Component Choice: Modern installations favor eco friendlier refrigerants like R448A or R134a to comply with environmental laws. In hot climates like South India, it’s crucial to select components like high-ambient refrigeration units that can perform reliably even when outdoor temperatures soar.

For a system perfectly matched to your business, it’s best to work with a manufacturer like F-Max Systems that can customize every component for your local conditions.

Layout Design

The internal layout of your cold room directly impacts its efficiency. A smart layout balances storage density with the need for uniform air circulation. You can’t just pack it to the gills. Planners focus on:

  • Airflow Paths: Stored items should never obstruct the flow of cold air from the evaporator (the unit cooler). Leaving a small gap between products and the walls is essential to prevent hot spots.

  • Shelving: Using open or wire style shelving rather than solid shelves helps cold air reach every item. The arrangement of shelves and pallets can dramatically affect temperature uniformity throughout the room.

  • Aisles and Doors: The layout must allow for easy movement of people and equipment while minimizing the time the door stays open.

Phase 2: Site, Foundation, and Utility Preparation

With a solid plan, the physical work begins. Preparing the site and foundation correctly is non negotiable for a long lasting and effective cold room installation.

Site Preparation

This stage involves getting the physical location ready for construction. The area is cleared, cleaned, and made safe for the installation crew. The single most important task is ensuring the floor is perfectly level and smooth. An uneven base can cause panels to misalign, creating gaps that compromise insulation and structural integrity. Installers will often mark the exact footprint of the cold room on the floor to guide the assembly.

Building a Solid Foundation

The foundation for a cold room does more than just support its weight; it provides a critical thermal barrier. For freezer rooms operating below 0 °C, this is especially important to prevent a destructive phenomenon called frost heave. Frost heave occurs when moisture in the ground freezes and expands, which can crack and buckle the floor from below.

To prevent this, a proper foundation includes:

  • A strong, reinforced concrete slab.

  • A vapor barrier (a thick plastic sheet) to block ground moisture.

  • Layers of rigid insulation boards to stop the cold from reaching the soil.

  • For freezers, low wattage heating cables or pipes are often embedded in the foundation to keep the ground temperature just above freezing.

Utilities (Power and Services)

A cold room is hungry for power. A reliable electrical supply is its lifeline. Most commercial cold rooms require a three phase power supply to run their compressors and fans. For critical applications like vaccine or pharmaceutical storage, a backup power source like a standby generator or an uninterruptible power supply (UPS) is essential.

Other utilities include:

  • Lighting: Energy efficient LED lighting is the standard, as it produces very little heat and performs well in cold temperatures.

  • Drainage: A drain line is needed to carry away water from the evaporator during defrost cycles.

  • Water Supply: If the room requires regular washdowns, a nearby water connection is necessary.

Getting Ventilation Right

Ventilation is a two part concept in any cold room installation.

  1. External Ventilation: The condensing unit, which is typically located outside, expels a lot of heat. It needs to be in a well ventilated area so that hot air can dissipate. Poor ventilation can cause the system to overheat and perform poorly.

  2. Internal Air Circulation: Inside the cold room, the evaporator fans must circulate cold air evenly to maintain a uniform temperature. Proper circulation prevents warm pockets and ensures all products are kept at the correct temperature.

Phase 3: The Build (Assembling the Insulated Structure)

This is where the cold room starts to take physical shape. The quality of the panel assembly determines the thermal efficiency of the entire structure.

Assembling the Insulated Panels

Modern cold rooms are built using prefabricated sandwich panels (PUF panels). These panels have a core of rigid foam insulation (typically polyurethane or PUF) with a low thermal conductivity of around 0.024 W/m·K, sandwiched between metal sheets.

They are joined together using cam lock mechanisms embedded in the edges. Installers use a special key to turn these locks, which pulls the panels tightly together for a secure, airtight fit. This modular system makes the cold room installation process incredibly fast and allows the room to be disassembled and relocated if needed.

Floor, Wall, and Ceiling Panel Installation

The assembly process follows a logical sequence:

  1. Floor Installation: For rooms with an insulated floor, panels are laid on the prepared level base. For heavy duty applications, a more common method involves laying insulation boards on top of a vapor barrier and then pouring a reinforced concrete floor over them.

  2. Wall Installation: Wall panels are set into a channel on the floor and locked to one another, one by one. Installers ensure each panel is perfectly vertical and that corners are square.

  3. Ceiling Installation: Ceiling panels are lifted and placed on top of the walls, resting in a notch designed for this purpose. For large rooms, the ceiling may need extra support from a suspension system or internal beams to prevent sagging.

Door Installation

The door is the most used component and a potential weak point for heat leaks. A professional cold room installation includes fitting a heavily insulated door with high quality gaskets to create an airtight seal. Freezer doors often have heater wires in the frame to prevent the gasket from freezing shut.

Crucially, every cold room door must have an internal safety release mechanism. This allows anyone inside to open the door, even if it’s locked from the outside, preventing accidental entrapment.

Sealing and Final Insulation Touches

The final step of the build is to seal every single joint and penetration. Installers apply flexible silicone sealant to all interior panel seams, corners, and junctions. Any hole made for pipes, wiring, or mounting bolts is meticulously sealed with grommets, foam, and sealant to prevent air and moisture from getting in. A perfectly sealed room is the key to energy efficiency and preventing messy frost buildup.

Phase 4: Refrigeration System Setup

With the insulated box built, it’s time to install the cooling machinery that makes it all work.

Mounting the Unit Cooler (Evaporator)

The unit cooler, or evaporator, is the component that sits inside the cold room and blows the cold air. It’s usually mounted high on a wall or ceiling. Its placement is strategic; it must be positioned to circulate air throughout the entire space without being blocked by shelving or products. A good rule is to leave a gap between the unit and the wall that is at least as large as the unit’s own thickness, ensuring free air movement.

Installing the Refrigeration Unit (Condenser)

The condensing unit, containing the compressor and condenser coil, is the heart of the system and is usually located outside. It should be placed on a solid, level surface like a concrete pad and fitted with vibration isolators to reduce noise and wear. It’s vital to leave plenty of space around the unit for maintenance access and unrestricted airflow. For a custom solution designed to handle the high heat of an Indian summer, you can explore specialized condensing units.

Connecting the Refrigeration Piping

Copper pipes connect the indoor and outdoor units, forming a closed loop for the refrigerant to travel. This part of a cold room installation requires precision.

  • Pipe Sizing: Pipes must be the correct diameter to ensure efficient refrigerant flow without causing a significant pressure drop.

  • Cleanliness and Brazing: Pipes are cut cleanly and joined by brazing (a form of high temperature soldering). This is done while flowing dry nitrogen through the pipes to prevent scale from forming inside.

  • Traps and Slopes: The suction line pipe is often installed with a slight slope and special “P traps” to ensure lubricating oil, which circulates with the refrigerant, makes it back to the compressor.

Power Distribution and Electrical Wiring

A qualified electrician connects all the components. This involves running a dedicated power circuit to the system, installing a central control panel with a thermostat and safety devices, and wiring the lights and fans. All wiring inside the cold room uses moisture and cold resistant cables, and any penetrations through the panels are sealed completely. Vapor proof LED light fixtures are standard for safety and efficiency.

Phase 5: Finalizing, Testing, and Commissioning

The cold room is built, but the job isn’t done. The final phase involves a series of rigorous tests to ensure everything works perfectly before you start loading your valuable products.

Setting Up Shelving and Storage

How you arrange storage inside the room matters. Best practices include using corrosion resistant, open wire shelving to promote airflow. It’s important to leave a gap of a few inches between stored goods and the walls and to avoid stacking products so high that they block the evaporator fans. A good rule of thumb is to keep items at least 6 inches off the floor for hygiene and circulation.

Refrigerant Charging

After a thorough leak test, the system is charged with the correct type and amount of refrigerant. Technicians use a digital scale to add refrigerant by weight. An incorrect charge, either too much or too little, can lead to poor performance, high energy consumption, and even compressor damage. The global cold storage capacity reached 719 million cubic meters in 2020, and every one of those spaces relies on a precise refrigerant charge to function.

Performing Leak and Pressure Tests

Before charging, the entire piping system is pressurized with an inert gas like dry nitrogen and left for 24 hours to ensure it is completely leak free. Even the tiniest leak can cause the system to lose refrigerant over time, leading to a loss of cooling.

Verifying with a Temperature Uniformity Test

This test, also called temperature mapping, confirms that the temperature is consistent throughout the entire cold room. Multiple calibrated temperature sensors are placed in various locations (corners, center, near the door) to log data over 24 to 72 hours. This identifies any hot or cold spots, which can then be corrected by adjusting airflow or storage layout.

Testing and Commissioning

Commissioning is the final quality check. The installation team performs a complete operational test, including:

  • Pull Down Test: Measuring how long it takes for the room to cool from ambient temperature down to its setpoint.

  • Control Verification: Testing that the thermostat correctly cycles the compressor on and off.

  • Safety Checks: Verifying that the internal door release, alarms, and any other safety features are working perfectly.

  • Defrost Cycle Test: Ensuring the defrost system for the evaporator works correctly.

Once all tests are passed, the cold room installation is complete, and the team will provide you with documentation and training on how to operate your new system. When you need a reliable cold room installation built to the highest standards, it’s essential to partner with experienced professionals.

Best Practices for a Flawless Cold Room Installation

To summarize, a successful project adheres to several key best practices:

  • Hire Certified Professionals: Never cut corners on labor. Experienced technicians are crucial for a reliable and long lasting system.

  • Thorough Testing: A complete commissioning process, including leak tests and temperature mapping, and ongoing preventive maintenance of cold rooms, is non negotiable.

  • Prioritize Sealing: Every joint, corner, and penetration must be perfectly sealed to maintain thermal integrity and efficiency.

  • Design for Maintenance: Leave adequate space around machinery for future servicing.

  • Focus on Safety: Ensure all safety features, especially the internal door release and alarms, are installed and tested.

By following these guidelines, you ensure your cold room will perform optimally, protect your inventory, and provide a solid return on your investment for years to come.

Frequently Asked Questions About Cold Room Installation

What is the first step in a cold room installation?

The very first step is comprehensive planning and site assessment. Before any construction, a professional team evaluates the location for structural soundness, accessibility, power availability, and proper ventilation to ensure the site can support the cold room.

How long does a cold room installation take?

The timeline varies depending on the size and complexity of the project. However, thanks to modern modular panels with cam lock systems, the physical assembly of a standard walk in cooler can often be completed in just a few days. Custom builds or large warehouses will naturally take longer.

Why is floor insulation so important for a freezer room?

Floor insulation is critical in freezers to prevent “frost heave.” This is a destructive process where cold penetrates the ground, freezes any moisture in the soil, and causes the expanding ice to crack and lift the concrete floor from beneath. Insulated foundations with vapor barriers and sometimes heating cables prevent this.

What kind of lighting is best for a cold room?

Vapor proof LED lights are the industry standard. They are highly energy efficient, produce very little heat (which reduces the cooling load), perform reliably in cold temperatures, and are sealed to protect against moisture.

Can I move my cold room after it has been installed?

Yes, if your cold room was constructed with modular insulated panels using a cam lock system. One of the main advantages of this type of construction is that the panels can be unlocked, disassembled, moved to a new location, and reassembled.

How do you ensure a cold room is airtight?

Airtightness is achieved through meticulous sealing. After assembling the panels, installers apply flexible silicone sealant to all interior joints, corners, and floor to wall junctions. Every penetration for pipes, wires, or bolts is also sealed with grommets and sealant to eliminate any path for air leakage.